Basketball Drills Defense: Weekly Plan for Coaches
Coaching-focused weekly workflow for basketball drills defense: stance, footwork, shell drills, and on-ball defense with integrated plans, video, scouting.
Key takeaways
- Establish a weekly workflow with defensive stance and defensive footwork as baseline; align staff and players.
- Build consistency with on-ball defense and closeouts, progressing 1-on-1 and 2v2 while tracking effort and pressure.
- Link shell drill to defensive rotations; diagram roles, plan read-based cues, and review clips to reinforce.
- Prioritize transition defense by sprinting back, maintaining gaps, and using quick video feedback for refinement.
- End the week with scouting-aligned review, exporting a concise PDF for staff and compiling playlists for players.
Practical Weekly Defensive Practice Workflow
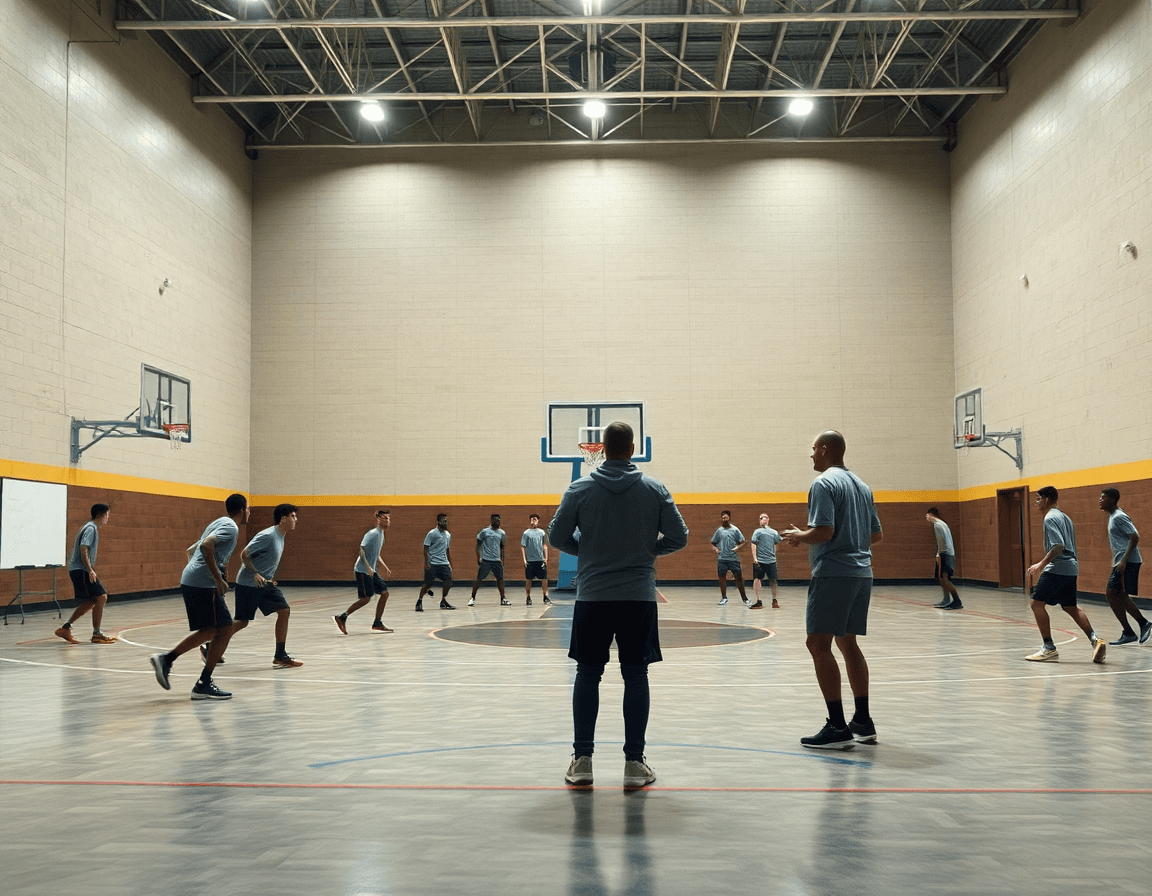
On a Monday film room screen, I map out a five-day defensive cycle that keeps every coach and player moving in the same rhythm. We start with the core building blocks: a sharp defensive stance and disciplined defensive footwork. Day 1 centers on stance and footwork basics, with quick ladder work and close-contact drills to ingrain posture and balance. The plan stays tight: a single practice plan that we can sweep across assistants and players, so everyone trains with the same tempo.
Day 2 shifts to on-ball defense and closeouts, turning stance into pressure. We run a progression: closeouts to contest, then mirroring ball handlers in 1-on-1 and 2v2 sets. The goal is consistency in technique across the floor and zero drift in effort. Our plan tracks who’s applying pressure, who’s recovering, and who’s getting beat—so progress is observable across the staff and the rotation of players.
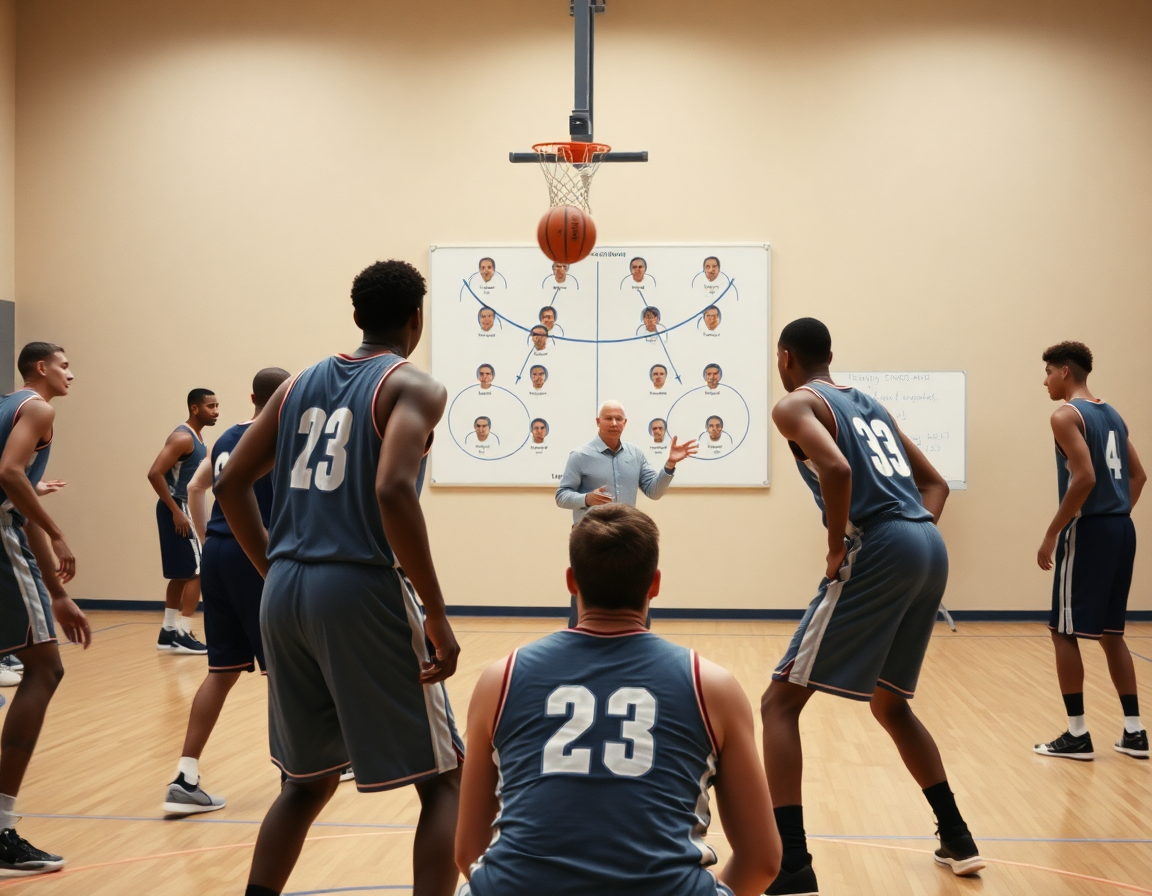
On Day 3 we lock in shell drill and defensive rotations. Before we hit the floor, the whiteboard shows rotations for different schemes and matchups. I diagram who drops, who steps to help, and where the weak-side pressure comes from. We reference the shell drill to connect individual stance and footwork to team integrity, with quick checks on 1-on-1 and 2v2 defense clips for later review.
Day 4 emphasizes transition defense and the importance of getting back with purpose. We rehearse sprint habits, gaps, and communication as we sprint to prevent easy baskets. We capture a short video clip after each transition drill to anchor feedback and tie it back to the scouting notes—the guys can see exact moments where help defense or rotations mattered.
Day 5 is a review with scouting input, the moment to merge plan and data. We export the week as a concise PDF for staff, and assemble clips into playlists to distribute to players. The workflow stays simple: plan, diagram, clip, review, repeat.
Foundational Defensive Fundamentals
Foundational defense starts with your defensive stance and defensive footwork. In every drill, we stress a balanced, knees-bent posture, quick lateral steps, and active hands just off the hips. Reps are logged in the plan, so assistants can reinforce cues: hips down, feet under them, hands ready.
These basics translate to both on-ball defense and zone defense concepts. When you're executing on-ball defense, the stance and footwork drive denial and recovery, while shell drill reps sharpen help defense and rotations.
Pull from the drill library: lane slides, zig-zag, closeouts, and the mirror drill to cement consistency across players. Each drill builds toward the same non-negotiables, just at different tempos. Build a week where defenders start with stance and footwork, then progress to 1-on-1 and 2v2 scenarios.
Embed these fundamentals into a weekly routine so improvements compound. In the plan, assign specific drills to days, pair with quick video clips, and use the whiteboard to map rotations. A simple sequence—stance/footwork → closeouts → 1-on-1 defense—keeps the team cohesive and coachable.
Finally, document progress in a shared plan so assistants can reinforce cues during drills and film review. Tie in scouting notes to tailor the shell drills to opponents, and use playlists of video clips to send to players for quick reinforcement.
On-Ball Defense and Help Rotations
On-ball defense is where a game starts and often where it ends. In my weekly plan, I’m stressing a stance that keeps players between the hoop and the attacker, with hips open and posture controlled. We fine-tune the basic pieces—defensive stance and defensive footwork—so feet stay light, eyes stay on the ball, and reactions stay under control. The goal isn’t flash moves; it’s consistent pressure that forces tough decisions for the ball handler. This foundation gates every new rotation that follows, from deny passes to closing out on shooters.
We run 1-on-1 from the elbow to sharpen individual defense, then move into sprint-slides to build lateral quickness and recovery speed. We add variations of help-defense denial to practice the transition from solo coverage to team coverage without gaps. The sequence locks in how on-ball defense links to defensive rotations, so when a drive is stopped, teammates know exactly where to slide and who communicates. Our shell drill evolves into live reads: as the ball moves, players practice cutting off driving lanes and reestablishing a ready stance for the next possession.
The whiteboard becomes our playbook for rotations during ball reversals. I map the path of each defender, the cues for communication, and the exact timing of help. The goal is clear: every player understands not just what to do, but why—how on-ball defense ties into deny passes and 2v2 defense situations. We pull quick coaching clips to reinforce technique, then compile a short video playlist for the defense-focused week. A simple clip of solid 1-on-1 defense or a well-executed help rotation can be the lightbulb moment for a player adjusting to a higher level of pressure.
Shell Drills and Transition Defense
Week by week, I start with a shell drill that grows from basic rotations to game-like decision points. In the practice plan, I map out the steps from a solid defensive stance to reading ball reversals and communicating across the floor, building true defensive rotations. On the whiteboard, I diagram each rotation and the cues I want the assistants to track, then pull a short coaching clip to reinforce the reads.
Then we layer in transition defense: sprint back, load, and wall off spaces to deny angles as the ball changes sides. The plan carries the shell into break scenarios, so we’re practicing decision points in motion. On the whiteboard I map the sprint-back angles and load points, and I grab a quick clip to show the spacing in transition.
Develop communication and anticipation to support rotations and deny passes. We drive vocal calls and range cues, then tighten technique with a proper closing out to shooters and the quick feet that pressure contests. In 2v2 and 1-on-1 looks we layer in on-ball defense and help defense cues to keep the shell honest under pressure.
After practice, we pull a quick coaching clip to reinforce shell reads and transition gaps, tagging it to the scouting note for the opponent and dropping a shareable link to players as a playlist. This is where the platform unifies planning (practice plans library), diagramming (whiteboard), video clips, scouting integration, and distribution, so the shell drill, transition defense, and rotations stay tight week to week.
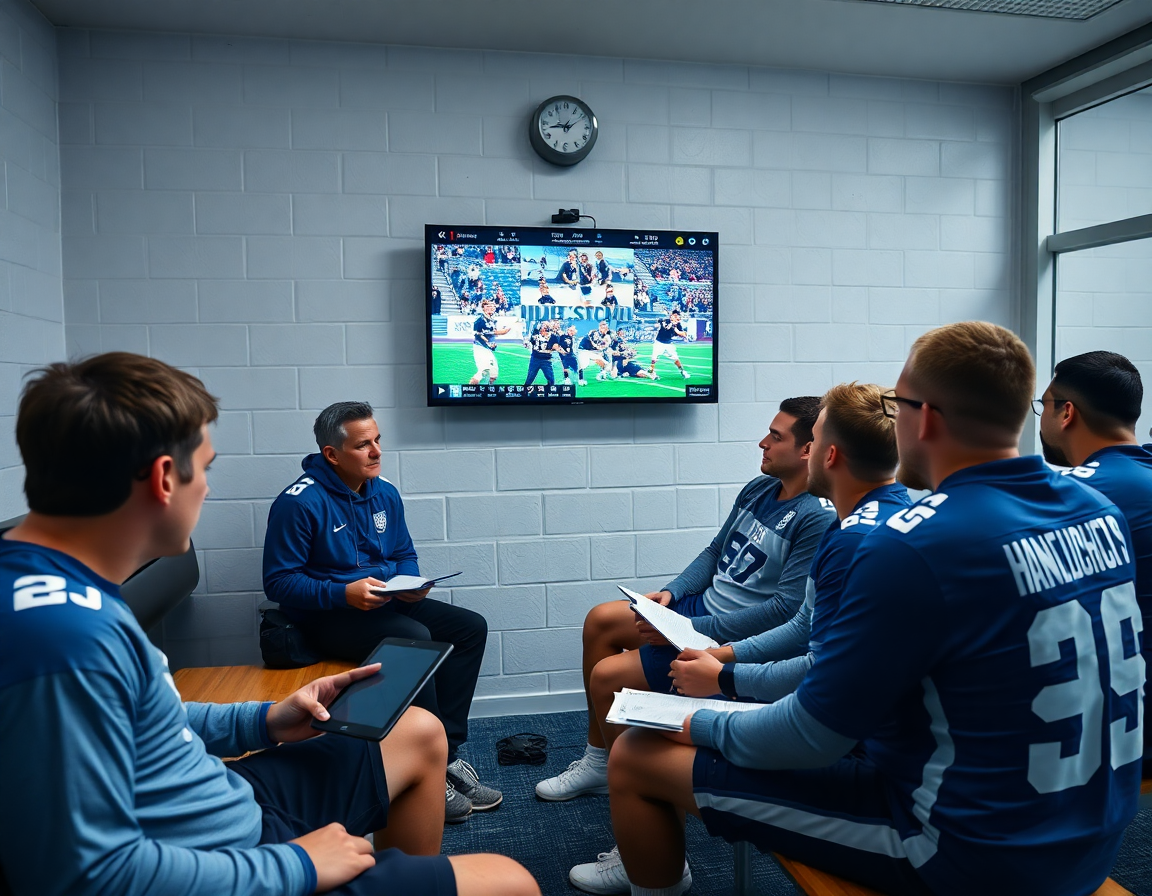
Video Review and Player Feedback
Video review is a coach’s weekly diagnostic for defense. I clip practice/game footage to highlight on-ball defense, rotations, and closeouts. The goal is to see feet, angles, and hand position in action, not just the final score. Clips are organized by matchup and scenario so I can pull the right cut during walkthroughs on the whiteboard and in the plan for the week.
Tagging players with cues and assigning clips via playlists is the driver for targeted work. I tag players with cues like “hips square” or “feet under you” and assign clips to specific playlists so a defender focused on defensive stance and defensive footwork can drill those habits. It’s all about making the learning stick in the moments that matter when we rep 1-on-1 and 2v2 scenarios.
Feedback lands in a shared space so players know where to improve before the next session. We post quick notes and annotated clips where everyone can see them, not just the coaching staff. Reference clips in practice plans to reinforce correct habits, so the next drill pack references the exact situation shown on film. The result is timely, concrete guidance that players can act on during warmups or early in the session.
Over weeks, we track improvement in key areas and adjust drills accordingly. You’ll notice gains in on-ball defense and defensive footwork, and we’ll shift emphasis from shell drill to sharper rotations or tighter closeouts when the film shows gaps. The weekly cycle—clip, cue, playlists, and practice-plan references—keeps defense-focused sessions cohesive and coachable.
Scouting and Opponent-Specific Adjustments
As a coach, scouting reports become your weekly compass. I pull the opponent tendencies—drives, ball screens, wings—and translate them into concrete tasks in the plan. In CourtSensei that means syncing the scouting notes with the practice plans library and labeling drills by action: deny passes, closeouts, on-ball defense. We open with a tight shell drill to lock in defensive stance and defensive footwork.
Countering their primary actions means tweaking the shell and denial strategies. If the report flags heavy drives, we tighten on-ball defense and quicken footwork; if wings are the pressure point, we emphasize deny passes on entry passes and sharper closeouts. We still rely on the shell drill to rep the rotations, with each rep mirroring the anticipated action.
From that clarity, I map it to four stations: 1-on-1 defense, 2v2 defense, help defense, and shell progressions that mirror the opponent's actions. Each station has a rotation order on the whiteboard, and players cycle through drives and post-up reads into correct rotations. Document the adjustments in the plan so the staff sees the exact rotations and keeps alignment on defensive rotations and on-ball defense.
Documentation and sharing. We record modifications in the plan and create short video clips showing corrected technique. We link game film to plan updates, generating playlists and shareable links for players and staff to study the scouting-driven adjustments.
Finally, this workflow turns game film into rapid plan updates. I tag clips that show the exact adjustments for zone defense, deny passes, and shell drill corrections, then link them to the plan with the scouting notes. When we meet, staff can walk through the new rotations and the players access the updated plan via playlists and the whiteboard.
Sharing Plans and Getting Players Involved
Sharing plans isn’t just about pushing out a PDF—it’s how you get players and assistants bought into the defense for the week. I drop a set of shareable links to the drills and clips and couple them with a playlist that walks through the sequence. In the clips, you’ll see the basics of a solid defensive stance and the grind of proper defensive footwork—the foundation before you even get to the calls on the shell drill. Players can open this on their device while the chalk is still fresh on the board.
Publish the weekly plan to the team library and send PDF exports to the staff so everyone sees the same flow. In the plan, I map out the key pieces: shell drill progressions, closeouts, and the 1-on-1 defense reps that build confidence in on-ball defense. Having the plan live means assistants can chime in, and the bench can reference the same visuals during timeouts. The clarity helps when you’re switching to a live look at the whiteboard and running through quick rotation diagrams.
Assign specific clips and drills to players to accelerate learning and accountability. For example, a guard practicing deny passes in 2v2 situations gets a clip paired with a drill that emphasizes feet and hips first, then hands. Labelled clips for 1-on-1 defense and help defense let players study the exact moves they should replicate in the drill sequence. This targeted approach keeps every player responsible for their piece of the defense.
Encourage feedback and adjustments to keep defenses dynamic and communicative. Players can leave notes on what felt sticky in a shell drill rotation or which closeouts looked too passive. Use those insights to tweak the plan midweek, not the following Sunday, so the defense adapts to the opponent.
Monitor engagement and iterate the plan weekly based on results. If the team struggles with a particular matchup, I pull in additional clips for 2v2 defense and tighten up the defensive stance and help defense angles, then push revised PDFs to the staff and updated playlists for the next cycle.
If you build plans like this every week, CourtSensei keeps your drill library, whiteboard, and video clips in one place — try it free.
FAQ
What are the best basketball defense drills for beginners?
For beginners, start with the basics: a solid defensive stance and quick footwork to build balance. Add simple drills like lane slides and mirror work to reinforce posture, then bring in 1-on-1 and 2-on-2 reps at a controlled pace. Focus on consistency and effort, not flashy moves, to build a solid foundation.
How do you run a shell drill in basketball practice?
Start with the basics: establish a steady defensive stance and patient shell drill progression. Call out rotations ahead of time on the whiteboard, then teach who drops, who helps, and where weak-side pressure comes from. Progress from 2-on-1 to 3-on-3 looks, emphasizing communication and timing. End with quick clips to verify alignment and effort.
What is the purpose of a closeout drill and how is it performed?
Closeouts train balance, contest, and communication. Start with players sprinting to shooters, then plant into a controlled, active defensive stance and raise hands to deny passes. Use short steps, keep hips square, and be ready to defend the drive. Remind teammates of calls and rotations to prevent gaps after the closeout.
How can you improve on-ball defense for my players?
Improve on-ball defense by tightening the stance, reading the ball handler, and applying steady on-ball defense pressure. Keep defenders between the hoop and attacker, with quick, controlled feet and a patient upper body. Build from elbow-to-elbow 1-on-1 reps to rapid recovery, then layer in pressure up the line and smart denial angles to boost anticipation and reaction time.
How do you defend the pick-and-roll effectively?
Defending the pick-and-roll starts with clear communication and smart rotations. Your big can hedge or drop or switch based on the ball handler’s speed and the shooter’s spacing. Force the ball handler away from the screen, then sprint into help, while the guard slides over and the weak side recovers. Practice these rotations until they feel automatic.
What is the difference between man-to-man and zone defense, and what drills train each?
Man-to-man emphasizes individual matchups; zone defense prioritizes collective spacing. Train man-to-man with closeouts, 1-on-1, and mirror drills to sharpen feet and balance. Train zone defense with shell rotations, lane slides, and help-the-helper communication to maintain gaps and quick recoveries. Tone every drill to reinforce the team’s alignment, not merely individual stops.
