Pick and Roll Drills: Weekly Coach-Plan Workflow
Coach-focused guide to weekly pick-and-roll drills: practical sequences, spacing, reads, plus planning, diagramming, video review, and sharing with players.
Key takeaways
- Embed pick-and-roll drills into your weekly plan to sharpen spacing, reads, and decision-making.
- Link reps to scouting notes and opponent tendencies to make every rep purposeful and film-ready.
- Create a drill library and export plans so staff stays aligned before the whistle.
- Schedule blocks for 2-on-2, 3-on-3, and variations to train reads and timing.
- After practice, clip key moments, label outcomes, and share playlists that tie film to the next opponent.
- Embed opponent scouting into the plan weekly to drive evolution and accountability.
Why pick and roll drills belong in your weekly plan
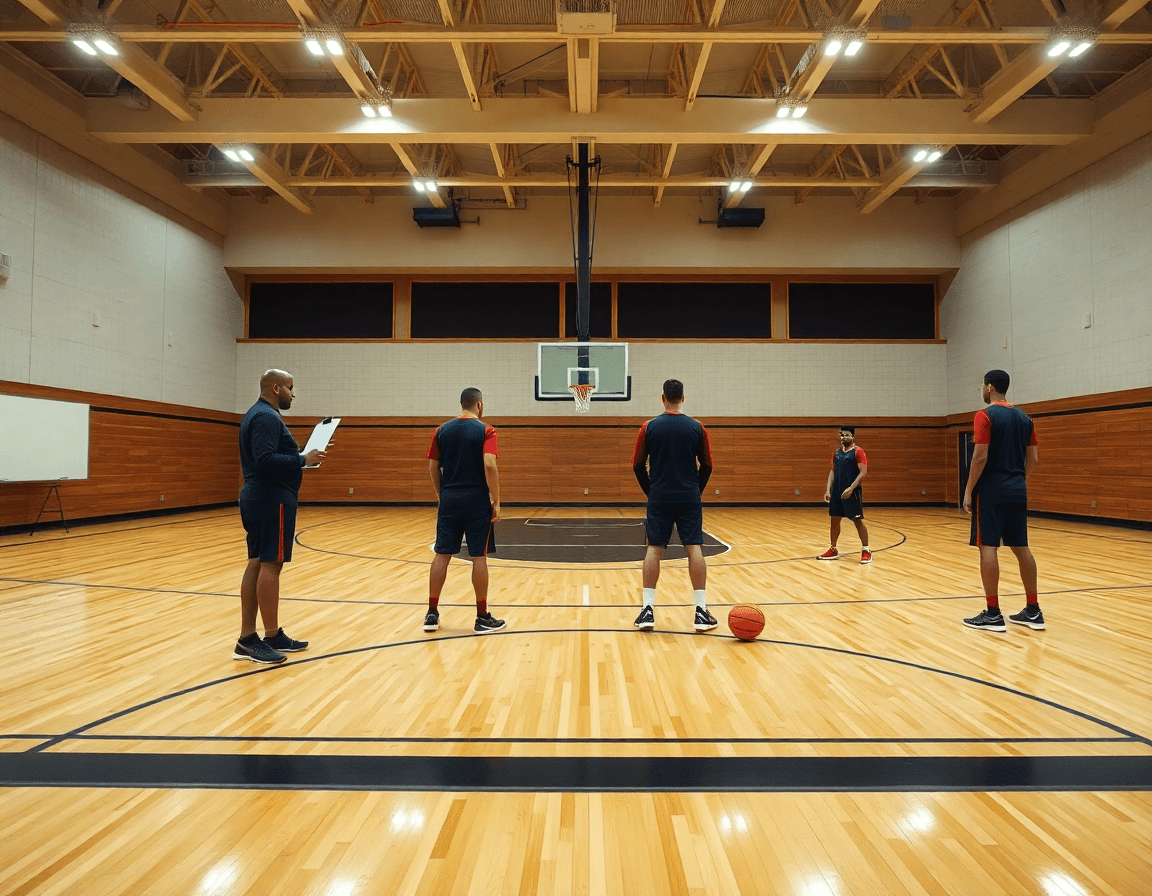
pick and roll drills are a staple offense across levels and a coach’s weekly plan anchor for spacing, reads, and decision-making. If you’re mapping the week, bringing PnR work to the front end helps reps feel intentional rather than random. On the floor, you’ll see the ball-handler reading the screen and deciding whether to turn the corner, slip, or swing to a shooter. With a clear plan, those reads become habits, not one-off moments you chase midweek.
Link the drills to scouting and game prep by pairing each rep with a purpose. Start with a drill library, share it with assistants, and export plans so everyone’s aligned before the whistle blows. In the plan of training, you can attach a scouting note for the opponent’s ball-screen tendencies and map those notes to specific PnR actions (ball screen, screen and roll, ball-handler reads). A short video clip after each block reinforces what to fix, and keeps the staff synchronized during a tough week.
Ultimately, a weekly plan focus helps every player see themselves in the equation: the screener who slips, the roller who rolls to space, the ball-handler who makes the read, and the pop shooter ready for space. By scheduling blocks in the plan, diagramming plays on the whiteboard, and clipping live reps, you create a loop: plan, practice, clip, share, repeat. That’s how you turn a handful of drills into a coherent, game-ready week.
Practical workflow for pick and roll drills
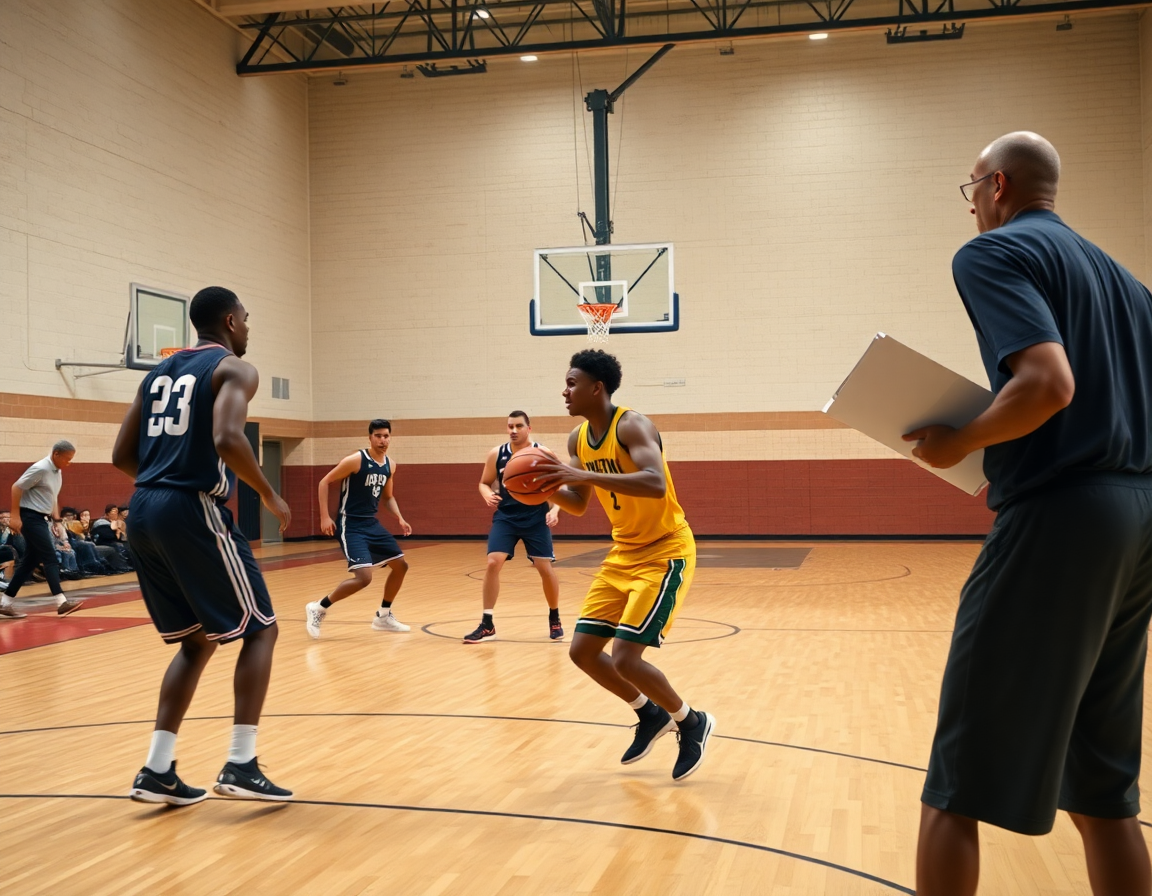
As a coach who lives in the weekly cycle, I keep a practical workflow for pick-and-roll that lives in Practice Plans and flows through the whiteboard diagrams into the film room. At the start of the week I set objectives for spacing, reads, and decision-making for the ball-handler and screener. This keeps our PNR reps tight and intentional, and ties drills to scouting notes for the upcoming opponent.
Step 1 — set weekly objectives: spacing, reads, and decision-making for the ball-handler and screener. Step 2 — choose 2-on-2 and 3-on-3 drill sequences; assign roles (ball-handler, screener, spacer). In the floor work, I run a pair of 2-on-2 looks that mirror the ball-screen and screen-and-roll actions our opponent uses, so the team builds timing without overload.
Step 3 — diagram the action on a whiteboard; annotate reads and options (roll, slip, pop). I label the paths: if the ball-handler reads help, the screener can roll; if the defense overhelps, the spacer can slip for a lay. Step 4 — run drills at game speed with controlled reps to build reads and timing.
Step 5 — clip key moments; label outcomes (drive, pass, shot, kick-out). Step 6 — build player playlists and share for study and feedback. Step 7 — update scouting notes for the next opponent; link film to practice plans. This sequence keeps the week cohesive—from planning, to diagramming, to execution, to film review, and finally to tying the opponent scouting back into next week’s PNR work.
Core drill sequences you can run this week
This week’s core sequences—PNR drill sequences—are built to fit a coach’s weekly workflow: start with a focused 2-on-2 PNR drill, move to a 3-on-3 PNR warmup, then layer in top-side and side variations. In your Practice Plans, label Sequence A, B, and C and attach a quick whiteboard diagram for the ball screen reads. The goal is to connect each drill to scouting notes and player development, so you can see progress in real time.
Sequence A: 2-on-2 PNR drill with standard reads (roll, slip, pop) and variations. In this setup, the ball-handler reads the screen from the screener, then chooses from roll, slip, or pop. Add variations: push the roller to roll early, slip to the basket if help arrives, or pop to space for a kick-out. Document the reads on the whiteboard and have defenders pressure the ball, testing timing and decision-making. Keep the drill tight and repeatable so players build confidence in the screen-and-roll.
Sequence B: 3-on-3 PNR warmup to simulate game flow and spacing decisions. In 3-on-3, you can simulate more realistic spacing as the ball-handler reads multiple routes after the screen. Let teams practice close-to-game reads, with defenders hedging, fighting over, or switching. This block trains ball-handlers to read the ball screen while teammates fill the lanes and create angles.
Sequence C: Top-side and side variations with progressive complexity for different defenses. Start top-side action to attack the help rotations, then introduce side variations against ice, hedge, or drop looks. Build tempo and ensure the screener communicates how to switch between roll, pop, and slip depending on the defense. Emphasize timing, spacing, and decision-making; track outcomes per rep (shoot, pass, drive).
With each sequence, keep a clean workflow: log the reps in the practice plan, capture a quick video clip, and drop it into a Playlist for quick review. After practice, pull those clips for player meetings and attach scouting notes that highlight what to adjust for the upcoming week.
Variations to challenge reads and spacing
In this week’s practice plan, we layer in variations to challenge reads and spacing within the pick and roll. By cataloging options like the Spain pick and roll, we force our ball handlers to process information quickly and adjust on the fly. The goal is to keep the reads in pick and roll honest, so the offense can react to how the defense responds in real time. We link these drills to our scouting notes and a quick video clip for each variation, so the team sees the intent as soon as the whistle blows. Bold emphasis helps the assistants follow the flow when we’re diagramming on the whiteboard.
Slip vs. pop reads; cueing options to pivot from the screen and attack gaps. We compare rushing toward the rim with a slip option against a pop read that opens space for a jumper. In the plan, we tag each decision point, and on the whiteboard we draw arrows showing the ball handler’s options after the screen. A brief video clip shows a live example: the screener sets the screen, the ball handler reads the hedge, then decides whether to turn the corner or relocate for the kick-out. This keeps reads in pick and roll actionable rather than theoretical.
Spacing patterns and defender reactions to create realistic decision points. We experiment with wider and deeper spacing, simulating multiple hedges and help angles. The defender’s footprint becomes a variable: will the helper angle toward the screen or drop back? We script this in the Practice Plans so the players feel the rhythm of the defense, allowing the ball handler to diagnose the defense and choose the best route to the gap or rim. Coaching cues here emphasize keeping the read game-like while maintaining tempo and flow.
Coaching cues to keep reads game-like: sell the screen, read the hedge, attack the rim or kick out. We want them to treat every ball screen like a live test, not a rehearsed drill. A short video clip paired with the diagram helps the team lock in on reads, spacing, and the resulting decision—without slowing the pace of the weekly plan. The result is a practical framework for reads in pick and roll that translates to real games.

Diagramming, coaching cues, and communication
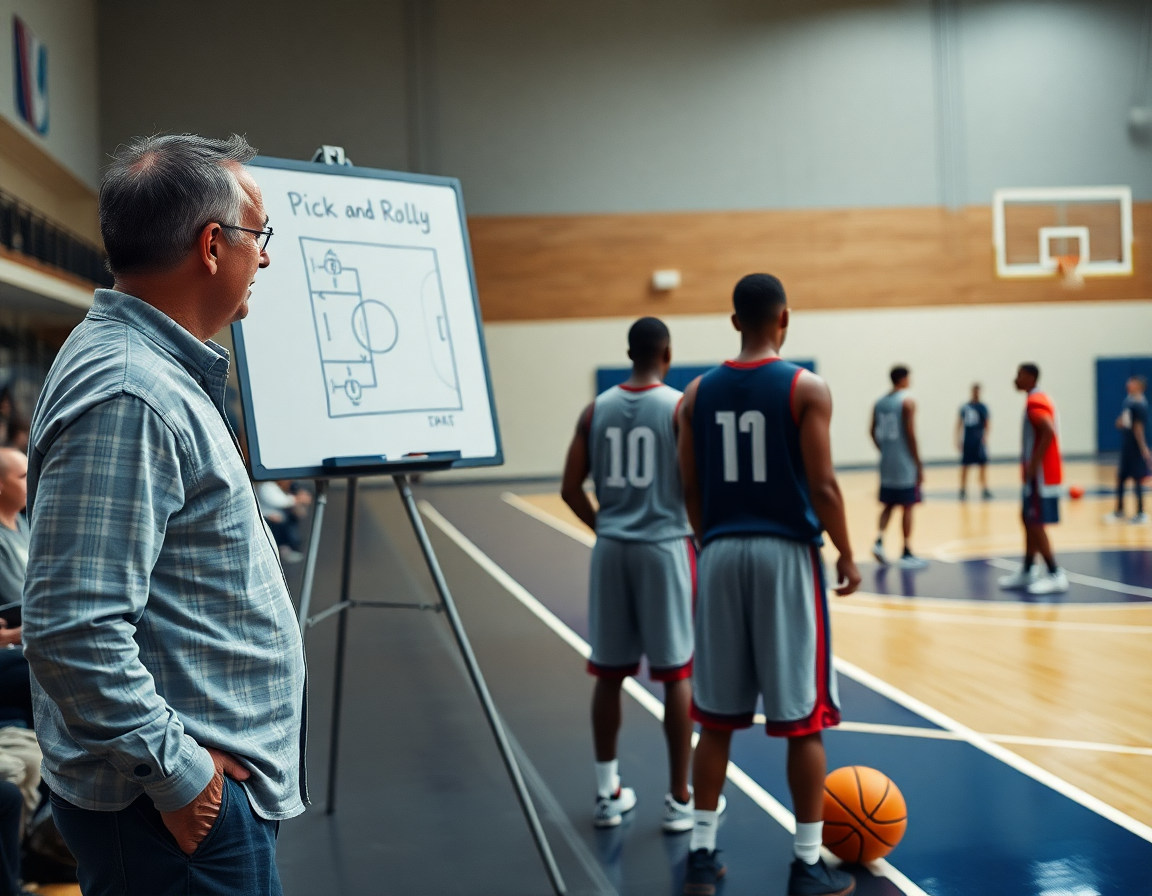
As a head coach, I start the week by laying out a clean diagram pick and roll on the basketball whiteboard. I sketch the ball-handler’s attack off the screen and the screener’s reads—roller, pop, or slip—so everyone can see the path before we rep it. This isn’t decoration; it’s the shared language we use in Practice Plans and scouting notes. When players hear a cue, they know where to go. When assistants see the diagram, they know what to reinforce in station work and in on-floor walkthroughs.
Label action types (BLOB/SLOB/ATO/PnR) right on the diagram, plus the recommended passes or decisions for each outcome. A simple example: the ball-handler hits the space, reads the helper, and either drives, kicks to the pop, or slips to the rim with the screener sliding to rim-protect. The coaching cues for PnR—“read the defender, keep your eyes up, trust the read”—are anchored to the diagram, not whispered instruction. This keeps our messaging consistent from practice to film session and makes it easier to correct misreads in real time.
Export your diagrams to PDF and share with assistants and players for prep and review. In our weekly workflow, the PDF becomes a quick reference during pre-practice walkthroughs and post-practice critiques. Tie the diagrams to scouting notes and video clips so players see the same action from a clip, then replicate it on the floor. A clear diagram, sharp coaching cues, and a ready-for-review PDF turn a cluttered schematic into a concrete, teachable moment for every screen and roll scenario.
Video review, player feedback, and playlists
Video review is where the weekly plan comes to life. After we run Pick and Roll drills on the floor, I pull the clips into our clip library, organized by read outcome: roll, slip, pop, kick-out. That lets me give targeted feedback to each role — screener, ball-handler, roller — without sifting through hours of footage. I tag a clip with read outcome: roll and jot notes on the ball-handler’s decision, the roller’s spacing, and the defender’s reaction. This is the backbone of a solid PNR video review.
Then I create player playlists for individual reads and assign study tasks. For a guard learning to read the screen, I build a playlist: ball-handler options vs screen, timing from the pop, and slip scenarios when the ball-handler turns the corner late. Each clip is labeled by read outcome and linked to a task — watch, annotate, and compare to the plan. This is what I mean by video playlists for players and it keeps development goals aligned with our weekly sessions.
Shareable video links let players study off the court; align clips with practice plans. I’ll push clips that illustrate a successful ball screen from the screener’s angle, then pair them with a scouting note on how the opponent typically defends the pick and roll. Players can study the reads—ball screen, screen and roll, read by the roller or the ball-handler—from home, then come back ready to discuss in the next meeting. The goal is simple: each clip supports a concrete read, from pop to slip, and ties back to our weekly plan.
In practice, the flow is natural: in the plan I tag the read outcome, on the whiteboard we diagram the action, a short video clip reinforces the decision, and the playlist keeps the team accountable to improvement.
From drills to scouting and opponent prep
Connecting practice to game-day prep starts when you translate outcomes into notes for the next opponent. After running your pick and roll drills, you jot quick scouting notes on how the defense hedges, drops, or switches. Was the ball-handler able to turn the corner against a hard hedge? Did the screener set up a solid ball-screen action, or did the roller slip into open space? Those observations ride with the drill data in the plan and the video clip, ready to drop into your scouting reports for pick and roll.
Turn the notes into action. You’ll design scout plays to counter or exploit the opponent’s PnR tendencies—hedge-heavy teams vs. quick ball-handlers, or drop-heavy teams vs. pop threats. Those counter-reads become part of your opponent prep pick and roll and populate your scouting reports for pick and roll. Tie each play to a specific role: the screener, the ball-handler, the roller, the pop, and even the slip option, so players know what to read and where to attack.
Maintain a cohesive weekly workflow by linking drills, video, and scouting in one system. You keep everything connected in CourtSensei: add your drill outcomes to the Practice Plans, attach the relevant video clip, and pin the scouting notes to the same opponent entry. That way, at Sunday film session you review how to scout pick and roll defense with the squad and map a plan for the week. The result is a tight loop: training drives scouting, which informs the next week's drills, all in one place—workflow that stays consistent.
If you build plans like this every week, CourtSensei keeps your drill library, whiteboard, and video clips in one place — try it free.
FAQ
What is the pick and roll in basketball, and why should I teach it this week?
In basketball, the pick and roll is a two-player action where the ball-handler uses a screen to attack, then the screener rolls to the rim or pops for space. It’s a core read-and-react concept in most offenses. Framing it in your weekly plan gives you consistent spacing, reads, and decision-making reps, turning on-ball reads into repeatable habits.
How do you run a pick and roll drill effectively?
Start with a tight 2-on-2 PNR to teach reads and spacing, then layer in a 3-on-3 tempo to mirror game flow. Assign roles (ball-handler, screener, spacer) and push reps to game speed. Clip key moments and label outcomes to guide feedback for the next session.
What variations should I use for pick and roll in practice?
Mix top-side and side variations to stress different defenses, and weave in the Spain pick and roll as a flavor for quick decision making. Include slip reads when help arrives and pop options when space opens. Tag each decision on the whiteboard and tie the drill to scouting notes for the opponent.
What is the Spain pick and roll, and how does it fit in practice?
Spain pick and roll is a spacing-heavy variation designed to slow the defense after the screen, creating multiple reads for the ball-handler. In practice, tag the action in your plan, have the ball-handler read help and decide whether to roll, slip, or pop, and keep shooters spaced to maximize kick-out opportunities.
What is the difference between pick and roll and pick and pop?
PnR keeps the screener rolling toward the basket after the screen, creating rim looks or kick-outs. PnP has the screener pop out to space for a jumper, with the ball-handler often continuing reads around open floor space. Use PnR when you want rim pressure, and PnP when you need immediate spacing and a shooter ready.
How does spacing affect the success of a pick and roll?
Spacing shapes angles, help rotations, and timing. Good spacing creates clear driving lanes for the ball-handler and keeps the screener open for a clean read. If spacing collapses, defenders can trap or switch, making reads slow. Emphasize spacing across the floor and have shooters hold their lanes for late kicks.
How do you defend the pick and roll?
To defend the pick and roll, defenders hedge or ice against the ball-handler, switch when needed, and contain the roller’s angle. Communicate rotations and recover to shooters on the weak side. The best plan links your defensive calls to the opponent’s PNR tendencies and keeps gaps tight without overreacting.
